# 生成安装程序
此示例说明了如何使用 Syslab AppBundler 在打包产物的基础上生成独立安装程序。
注意
Syslab AppBundler 暂不支持在 Syslab Online 中使用。
# 1. 功能说明
AppBundler 提供在生成普通打包产物的同时生成独立安装程序的功能,通过指定 installer=true,可以在 Windows 下生成 .exe 安装程序,Linux 下生成 .run 安装程序。
安装程序适用于将 AppBundler 生成的打包产物分发给其他用户,可以通过图形界面或命令行把打包产物安装到指定目录,安装目录默认为安装程序所在同级目录。
此外,该安装程序支持静默安装,通过 /S 或 --silent 的指令,可以让用户无需任何操作直接将打包产物安装到指定目录中。
下面介绍为独立应用程序生成安装程序的用法,C 共享库生成安装程序的用法类似,暂不叙述。
# 2. 为独立应用程序生成安装程序
在 modfun 文件夹中创建 main.jl 文件,作为打包的主文件。
using TyPlot
function modfun(m, n)
    axis([-1 1 -1 1])
    axis("square")
    axis("off")
    hold("on")
    z = exp.(2 * im * pi * (0:n) / n)
    for j = 0:n
        zj = [z[j+1], z[mod.(j * m, n)+1]]
        plot(real(zj), imag(zj))
    end
end

function main(ARGS)
    if length(ARGS) == 2
        m = parse(Int, ARGS[1])
        n = parse(Int, ARGS[2])
        modfun(m, n)
    elseif length(ARGS) == 0
        modfun(105, 200)
    else
        error("错误的输入参数,需要输入两个正整数")
    end
end

main(ARGS)

TyPlot.plt.show(block=true)
然后在同一文件夹中创建 build.jl,将 installer 设置为 true,并传入 TyAppBundler.bundle_app。
using TyAppBundler

app_name = "ModfunProject"
src_dir = @__DIR__
dest_dir = joinpath(dirname(src_dir), app_name)
user_file = joinpath(src_dir, "main.jl")
deps = ["TyPlot"]

has_runtime = false
create_log_file = false
encrypt = true
force = false
installer = true

TyAppBundler.bundle_app(
    src_dir,
    dest_dir,
    user_file,
    deps;
    app_name=app_name,
    has_runtime=has_runtime,
    create_log_file=create_log_file,
    encrypt=encrypt,
    force=force,
    installer=installer,
)
运行 build.jl 后,会同时生成普通应用输出目录和安装程序输出目录。
# 3. 生成结果
Windows 下生成的安装程序目录示例:
ModfunProjectInstaller/
    ModfunProjectInstaller.exe
    ModfunProjectInstaller.payload
Linux 下生成的安装程序目录示例:
ModfunProjectInstaller/
    ModfunProjectInstaller.run
    ModfunProjectInstaller.payload
.exe 或 .run 文件需要和对应的 .payload 文件放在同一目录下使用。
# 4. 运行安装程序
# 4.1 通过安装包运行
Windows 下可以双击 ModfunProjectInstaller.exe 打开安装界面,并在界面中选择安装目录。
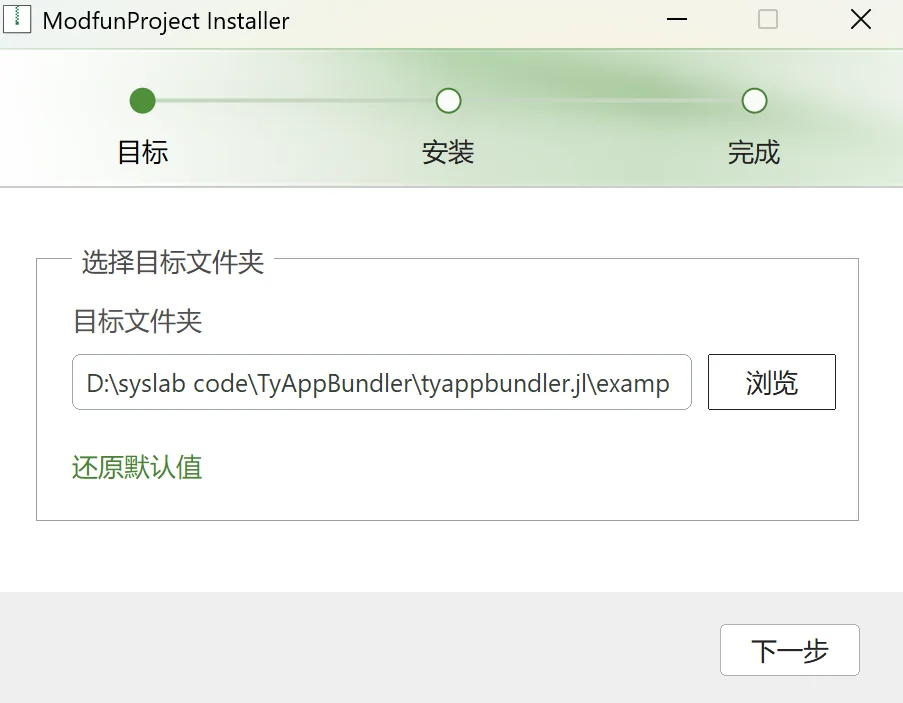
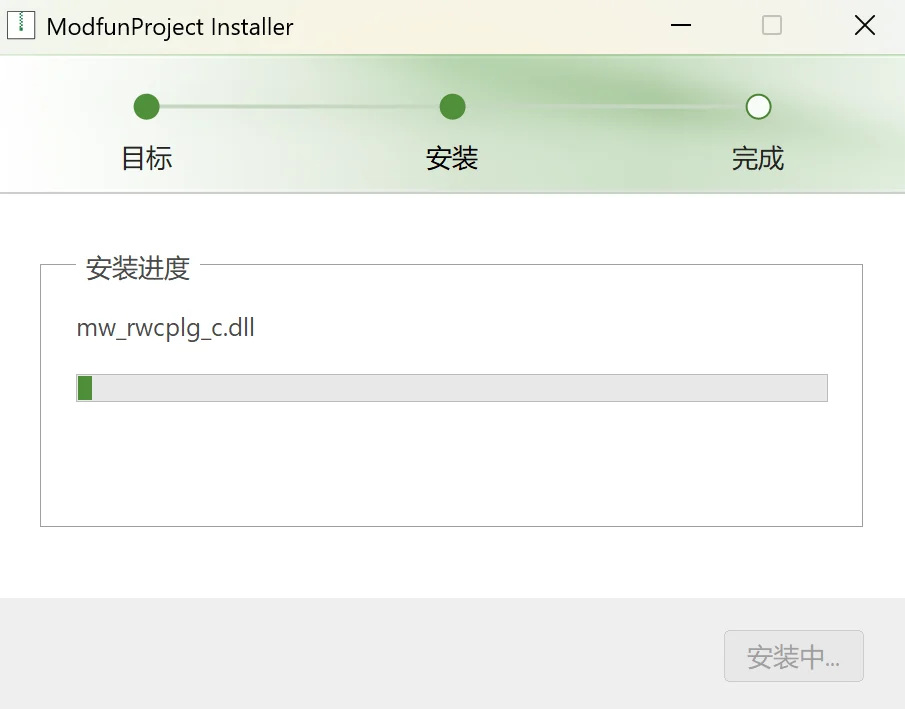
单击下一步,开始安装。
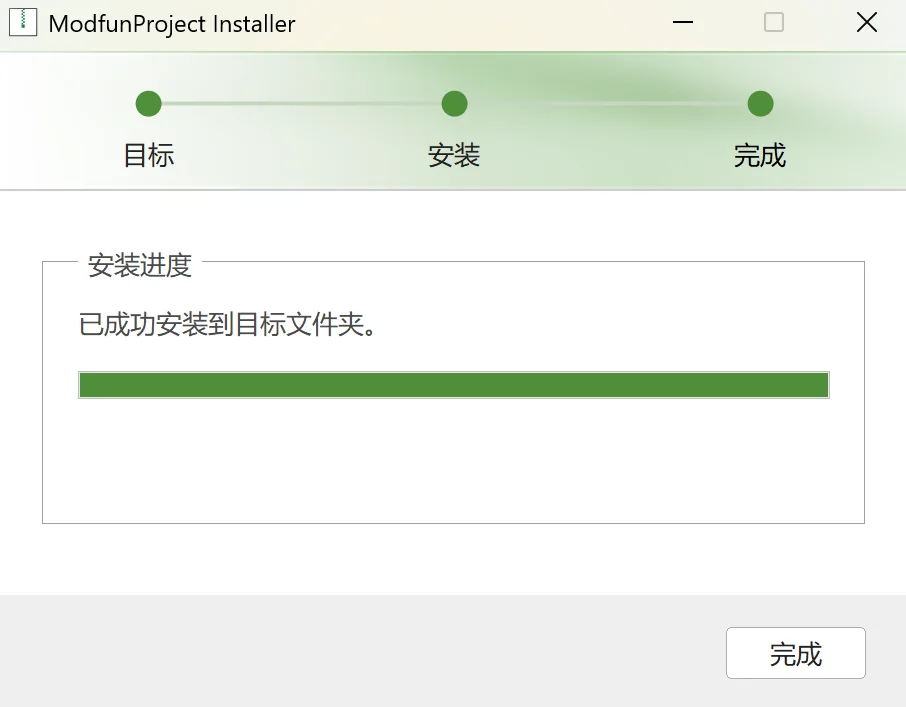
完成安装后单击完成按钮,结束安装。
Linux 下可以直接运行 ModfunProjectInstaller.run,并按终端提示确认安装目录:
./ModfunProjectInstaller.run
# 4.2 通过命令行运行
# Windows
.\ModfunProjectInstaller.exe -p .\ModfunProject
/S 和 --silent 均表示跳过目标选择,直接开始安装。
.\ModfunProjectInstaller.exe /S
或:
.\ModfunProjectInstaller.exe --silent
指定安装目录并直接安装:
.\ModfunProjectInstaller.exe --silent -p .\ModfunProject
# Linux
./ModfunProjectInstaller.run -p ./ModfunProject
/S 和 --silent 均表示跳过确认,直接开始安装。
./ModfunProjectInstaller.run /S
或:
./ModfunProjectInstaller.run --silent
指定安装目录并直接安装:
./ModfunProjectInstaller.run --silent -p ./ModfunProject
# 5. 注意事项
安装程序文件和 .payload 文件必须保持在同一目录下,否则安装程序无法读取安装数据;
.payload 文件保存了完整的打包内容,因此安装程序目录会再占用一份与普通打包输出目录相同的磁盘空间,请提前确保有足够的磁盘空间。